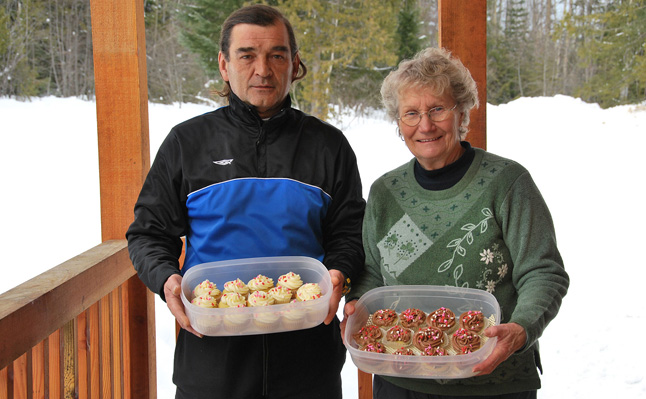
With Valentine’s Day next week, it seems a good time to think about making a batch of snacks for a class or party.
The last few weeks have taught me a lot about cooking for a crowd. One supermarket line-up chum, seeing me with four packs of cupcake liners and 3 pounds of butter, guessed what was up.
“I remember the time I did burgers for 100,” she said. “Took me all night to mix the meat with onions and crumbs and egg, and shape the burgers, and of course the helpers who said they would pitch in turned out to be busy that night.”
My helpers turned up and were very willing, for which I’m very thankful. Challenges other than the sheer number of minutes you stand there prepping and cooking include:
• estimating quantities. Pat Anderson, who helps with United Church food, notes that some church events are particularly perplexing because no-one knows how many people will come.
• planning your time. It simply takes a lot longer to make 100 of anything than to make 30. And the clean-up is equally stretched.
• deciding to go for one huge batch or several smaller ones. Bowls, baking tins, pots, utensils, have to stretch to quantity if you go for the single batch. But duplicating batches means washing and clean-up after at least every two—for me, anyway, as things get so messy.
• assessing stove and oven capacity. Often necessitates several batches, widening the time frame.
• clearing space: on counters, in the fridge, freezer, and in the car.
• delivery: transporting hot food from your kitchen to somewhere else, or carrying quantities of delicate pastries, or even one large decorated cake, is awkward unless you are equipped with the proper gear.
Considerable thought and ingenuity, a long-term planning cycle, and dedicated energy on event day, are required. It amazes and humbles me to hear the number of people in Revelstoke who do provide catering — volunteer and professional — for events here.
It’s easiest to use the community or church kitchen where an event will be held — less chance of damage from spoilage (big fridges at 4° C, the Food Safe temperature for storage of hazardous foods including meats and dairy products) and from bashing things around during transport. Such kitchens are often well equipped with stainless steel counters and large sinks.
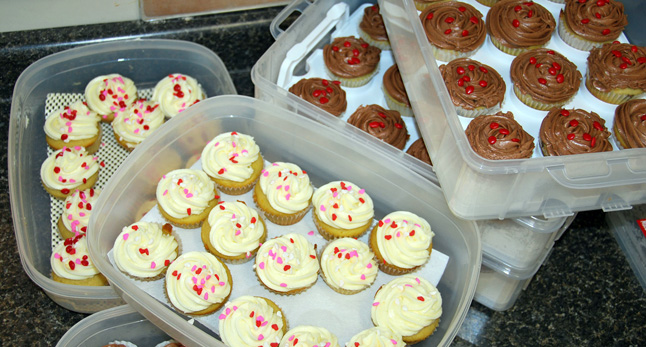
I made 120 Valentine cupcakes for the Scream Relay at MacPherson for the Nordic Ski Club, and was able to store them in the fridge there — good thing, as my own is pretty crowded. I had to borrow some plastic containers and even these, we used two large foil bakers with trays on top for storage, and took up the entire fridge. You can’t layer them once they’re iced.

Valentine Cupcakes for a Crowd
These can be done in two flavours: it’s a basic plain cupcake recipe using real butter and buttermilk for a tang, with the batter divided in two — chocolate chips in one half and orange zest in the other, with chocolate icing or lemon icing. None of the flavours are strong — this seems to work best with a variety of children, some of whom just don’t eat anything highly flavoured.
Choosing cupcake numbers and size is a planning decision. The recipe below is given in three quantities: for 30, 60 or 120 medium-sized (liners come in large, medium and small) cupcakes. It took me all of one evening to make 120, and the next morning, about 4 hours in all, to make the frosting, decorate and store the cupcakes. The basic recipe is from the big yellow Gourmet cookbook.
Note: the recipe calls for sifted cake flour and unsalted butter. Don’t be tempted to substitute all-purpose flour or salted butter. If you must use all-purpose flour, reduce quantities by ¼ cup for the 30-cupcake recipe, ½ cup for the 60-cupcake recipe, and ¾-1 cup for the large 120 cupcake recipe. Be prepared to experiment: the batter should be stiff enough to stay on a large spoon until overturned when you dollop it into the cupcake liners.
Equipment
2 large bowls
electric mixer, hand mixer or standing
cupcake liners, medium size
muffin tins, 4 if possible
cooling rack
measuring utensils and a scale
plastic containers for icing quantities
spatulas
frosting bag and a 1M Wilton frosting tip
sprinkles
INGREDIENTS
| For 30 cupcakes | For 60 cupcakes | For 120 cupcakes | |
| CUPCAKE BATTER | |||
| Sifted cake flour (not self-rising) | 3 ¼ cups + 2 tbsp | 6 ¾ cups | 13 ½ cups |
| Baking powder | 1 ½ tsp | 1 tbsp | 2 tbsp |
| Baking soda | 1 ½ tsp | 1 tbsp | 2 tbsp |
| Salt | 1 tsp | 2 tsp | 1 tbsp |
| Unsalted butter, softened at room temperature or in the microwave but not melted | ¾ cup | 1 ½ cups | 3 cups |
| White sugar | 1 ½ cups | 3 cups | 6 cups |
| Vanilla extract | 1 ½ tsp | 1 tbsp | 2 tbsp |
| Eggs, beaten | 3 large | 6 large | 12 large |
| Buttermilk, shaken | 1 ½ cups` | 3 cups | 6 cups |
| FROSTING | |||
| Unsalted butter | 15 oz., or 1 cup less 1 tbsp | 30 oz, or 1 lb plus 14 oz, or 4 sticks plus another ½, or 2 ¼ cups.. | 4 ½ cups, or 2 lbs plus ½ cup. |
| whipped cream cheese | 1 cup (8 oz) | 2 cups (1 lb) | 4 cups |
| Icing sugar | 3 cups | 6 cups | 12 cups |
| To flavour icing, divide icing batter in half and add to each half | |||
| For chocolate icing | |||
| Add unsweetened chocolate, melted | 1 ½ oz | 3 oz | 6 oz |
| For lemon icing | |||
| Fresh lemon juice | 1 tbsp | 2 tbsp | 4 tbsp |
STEPS
1. Preheat oven to 350° F.
2. Line muffin tins with medium cupcake liners.
3. Mix together in one large bowl the flour, baking powder, baking soda and salt.
4. Mash butter with large spoon until soft, or carefully nuke in a microwave until you can squash it with the back of a spoon.
Add sugar and beaten eggs plus the vanilla to the butter and mix in an electric mixer, or with electric beaters (if you do the whole large recipe in one batch, it won’t fit into a standing mixer bowl, so you’ll need a hand-held mixer.) This is a tough job and a messy one, but eventually you can beat them all together.
5. Add the buttermilk and the flour ingredients alternately, and mix well, very slowly until all ingredients are incorporated.
6. Mix with beaters at high speed for about 2 minutes.
7. Fill muffin cups two-thirds full.
8. Bake for 16 minutes in preheated 350° F oven.
9. Remove from oven and put each cupcake on a rack to cool while you fill the muffin cups and cupcake liners again until all batter is used up.
10. The cupcakes can be stored in covered containers overnight or for 2 days in the refrigerator.
ICING
1. Soften the butter as for the cupcakes, and mix in an electric mixer with the cream cheese until both are whipped and fluffy.
2. Add the icing sugar and mix in, slowly, then beat for 2 minutes or until the icing is light and fluffy.
FOR CHOCOLATE
3. Melt the chocolate in a pan over, not in, hot water, or in the microwave at medium heat for 30 seconds at a time until the chocolate is melted.
4. Mix into half the icing mixture and blend well, beating again.
FOR LEMON ICING
Into the other half of the icing, add lemon juice and beat again
DECORATING
I use Wilton cake decorating gear available at Chantilly. All you need for these cupcakes is a bag — the biggest one if you are making 120 cupcakes and the 1M tip. You do not need what is called a “coupler” with this tip, as it is large enough to fit right into the bag. If you don’t have the bag, you can cut the corner off a freezer bag and use that, but I find the purpose-built item makes life easier.
This icing looks really nice piped onto the cupcakes. You simply fill the bag with the tip in it (ask at the shop how to do this), scrunch the open end into a neat twist so it’s firmly closed, and squeeze the icing out in a circular pattern from the outside in, ending in the centre.
Sprinkle some little hearts on the icing and you’re done.
Store these cupcakes in the refrigerator until it’s time to eat them. I bought large flat plastic containers at Fields to store them in, and lined these with the nubbley plastic non-skid sheeting to stop them from shifting about in the container. You can buy purpose-built cupcake containers too — Chantilly has a lovely display one.
Watch out though — cake decorating using a tip is addictive, and you may end up taking Colleen’s course. All the equipment is included, and the four evenings are very productive.


