
Bread and wine and thou. The staff of life. Break bread together. Got some bread, man?
We use bread as a metaphor for the sacred, for love and for all other food, even for money. No food resonates in our culture as much as bread.
Do you wonder why more of us don’t bake bread at home?
Well, first of all, time. All that kneading and rising. Also, in the distant Euro-past that gave us bread as a staple food, people were poor and ovens were scarce. One per village, belonging to the baker, who did the work for peasants who were busy sowing, growing, reaping and milling the grain, and for the nobility who were busy being aristocratic.
In Revelstoke, with three excellent bakeries in town — The Chalet, The Modern and The Baguette — plus the one at Cooper’s and another somewhere supplying Southside, there’s no reason, perhaps, to bake bread at home.
So why bother? Well, I LOVE bread. Totally. Especially artisan breads. I love the sheer pleasure of mixing up all that flour in a huge bowl, and getting my hands into the warm, living mass (yeast is alive) that is bread dough. And that wonderful aroma — freshly baked bread, in my very own kitchen.
So how to do it?
The easiest way to make bread at home is to buy a bread machine. You can get a Cuisinart bread machine at Chantilly, or, for really serious breadmaking, Dini can get you a Zojirushi supplied thorough Bosch. I’ve used a bread machine for years, and as long as you can measure accurately, follow a recipe, and read the timing instructions, a bread machine produces reliably consistent loaves, year after year. In our household, it was part of the masculine contribution to the kitchen to make bread; for reasons unknown to man or beast this handy arrangement is no longer.
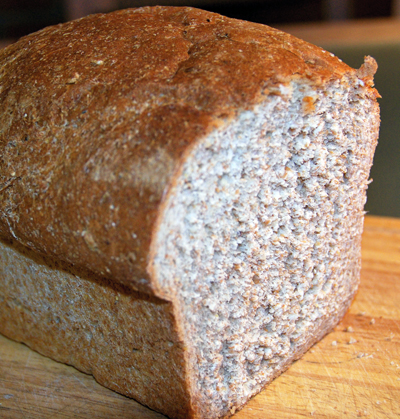
To compensate, I went to Geoff Battersby’s Bread Making class last month. With his permission, the recipe for his multigrain bread is below. It’s a good class, by the way, well worth the small fee, and Geoff shows you how to make a terrific loaf. You take it home to bake it, and mine turned out very well—even of crumb, high, and nicely textured.
Then Laura Stovel brought me another suggestion, in a book titled Healthy Bread in Five Minutes a Day, by Jeff Herzberg and Zoë François. This couple have been experimenting for years with bread recipes that don’t require babysitting. NO KNEAD bread. Truly. It’s amazing, but it does work, astonishingly well. Their whole wheat bread is moist, even-crumbed, and chewier than most bakery whole wheat bread, with a texture more akin to sourdough. You mix the dough, leave it to rise, put it in pans, and bake. You can keep the dough in the refrigerator for up to two weeks, and break off a piece anytime for fresh bread every day.
Warning: use fresh yeast, and make sure that your whole wheat flour is also fresh. I once used some that was perhaps 6 months old, that had not been refrigerated, and the oils in the whole wheat germs must have been a little rancid — the bread tasted odd and beery, as though it had been fermented.
You can also make buns with some of the dough in the second recipe, and they were great. Cut the cooking time to two thirds.

Geoff Battersby’s Multigrain Bread
Makes 4 substantial loaves
The secret to making good bread from scratch is a wonderful gizmo called an instant read thermometer. I bought one at Chantilly after taking Geoff’s class, and have not had a bread failure since. The temperature of the water is critical — between 95 and 105 degrees Fahrenheit. If the water is too warm it will kill the yeast; too cold, and it will just take hours, or days, to rise.
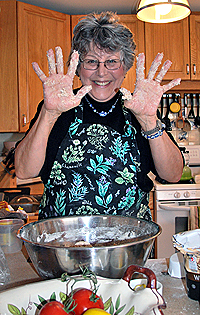
Geoff’s method is really fun, and very “authentic,” as you do the mixing on a countertop, the way bakers used to do. It makes a terrific mess, which is easy to clean up in the steel-table-equipped Community Centre kitchen. Make sure you have a big clean scrubbable table or countertop.
The thing to remember is that yeast is alive. Buy yeast in a jar or tin, not a paper packet. Once you add water, the yeast mold leaps into action. But water that’s too hot will kill off the bacteria that make it live, and water that’s too cold will delay the action. Yeast has a best before date that’s real.
Equipment
large bowl
large pot
measuring cups
measuring spoons
4 bread tins (4 ½ inches x 8 ½ inches) or 2 cookie sheets
elbow grease
Ingredients
½ cup water at 100 degree Fahrenheit
½ tsp sugar or honey
2 tbsp yeast
5 cups water, also at 100 degrees Fahrenheit
½ cup oil
½ cup honey
¼ cup molasses or use ¾ cup honey if you like bread lighter or dislike molasses
4 tsp salt
2 cups coarse oats
7 cups whole wheat flour
5-6 cups white flour
1½ cups 9-grain or 12-grain cereal, or a mixture of flax, sunflower, sesame, and poppy seeds, millet and cracked wheat
Method
1. Mix the yeast with the ½ cup of warm water and ½ tsp sugar or honey. Stir briefly, then let the mix sit there until the yeast bubbles up to double in volume. This is called “proofing” the yeast.
2. Put in a pot the oil, honey, molasses, salt and 1 cup of warm water. Heat just enough to dissolve the salt and make a smooth mixture of these ingredients. Add another 3 cups of water, cold or warm, so that the resulting mixture is again about 100 degrees Fahrenheit. Remove from the heat.
3. In a big bowl, put 4 cups of the whole wheat flour, the oats, and the multigrains or seeds. Mix well.
4. Add the liquids to this dry mixture, and the yeast (now “proofed”). Stir well, to integrate the liquids, flours, and the yeast mix.
5. Add the rest of the whole wheat flour — another 3 cups.
Now the fun begins:
Sprinkle a little white flour on a countertop or table area about 3 feet square. Empty the mixing bowl contents onto it. Add 2 cups of white flour on top, and start mixing it in with your hands. Add more flour when possible, until 4-5 cups are used up. Keep adding a little more flour as you mix and knead the bread to create a not sticky but still pliable dough.
Knead the bread for about 10-15 minutes. This is where the elbow grease comes in. To knead, have the dough on the table in front of you. With one hand, fold a third of the mass into the centre; then with the other hand, fold the other side in. Press down very firmly, so that the ball of dough gets flat enough to repeat the folding process. Now turn the dough 90 degrees—a quarter turn—so that the vertical fold line is horizontal. Press the dough and repeat the folding process. Do this until you think your arms will fall off, and then do it some more.
When the dough seems sufficiently kneaded—it will be smooth, quite elastic, and increasingly difficult to fold over—put it in a large bowl, sprinkle a little flour or oil on it, and cover with a clean damp tea towel.
Rising
Let the bowl of dough sit in a sheltered slightly warm place — on top of the fridge is good — until the volume doubles, about 1 ½ hours.
Punch it down: take your fist and literally punch the dough in the middle. It will deflate. Punch it several times. Shape it into a nice ball again, and repeat this process. Let the dough rise a second time, about 1 hour.
Shape into loaves for the final rise
Divide the dough into four. Shape each quarter into a ball. For cookie sheet free-form loaves, oil the cookie sheets lightly, and make two nice balls on each sheet, well spaced apart.
If you are using loaf tins, oil lightly, and stretch each dough ball into an oval tube shape the length of the bread tin.
Let rise again until double in size — 1 ½ to 2 hours.
Bake for 40 minutes in a preheated 375 degree oven.
Laura’s Recommendation: No Knead Refrigerator Whole Wheat Bread

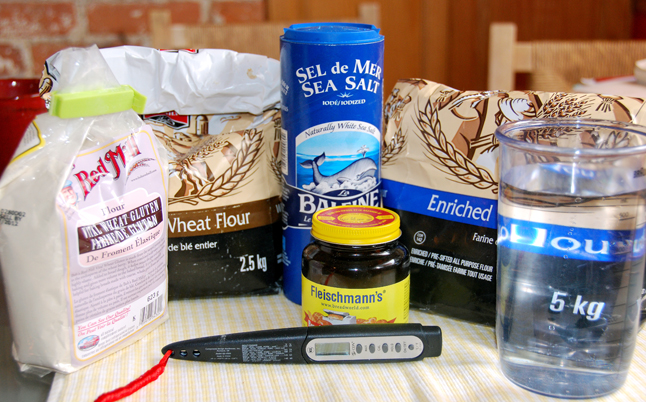
One secret to this bread is wheat gluten that you add to the dough. Wheat gluten adds chewiness to the bread, and makes possible the rising without kneading.
The other secret is to put some water in a pan on the bottom shelf of the oven to create water vapour during baking. Also, you sprinkle water on the tops of the loaves when you put them into the oven. I don’t know why this works — something about the moisture content of the oven air during baking.
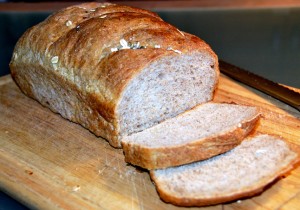
This is a great recipe with zero fat. It makes amazingly good bread. Not as high or risen as kneaded bread, but with good chewiness and flavour. The Hertzberg/FranÁois book gives more recipes for other types of no-knead bread.
Equipment
a huge bowl or 2 very large ones
measuring cups and spoons
a bread tin or cookie sheet
instant-read thermometer
plastic wrap
Ingredients
5 ½ cups whole wheat flour
2 cups white flour
1 ½ tbsp yeast
1 tbsp salt
1 tsp sugar
¼ cup wheat gluten
4 cups water at 100 degrees Fahrenheit
Mix all of the above together in a huge bowl. Stir well with a wooden spoon.
Dough will be a little damper than you expect it to be, but will still be fairly stiff.
Cover with a lid or plastic wrap. If you don’t have a huge bowl, at this point, divide the dough into two medium large bowls. Cover with plastic wrap but leave a little hole for gases to escape. Let the mix rise for at least 2 hours, in a place that is draft-free and perhaps slightly above room temperature. (My kitchen is cold, so I use the top of the fridge.) The dough will more than double in volume during this rising period.
To use immediately
Divide the dough in 3. Shape into 3 loaves and put into 3 lightly oiled bread tins 4 ½ inches x 8 ½ inches. Alternatively, shape into round balls and set on two cookie sheets, lightly oiled. Let rise for 1 hour. Preheat the oven to 450 degrees. Set on the bottom shelf a pan of water as you put the bread in, and sprinkle the tops of the loaves lightly with water. Also, sprinkle seeds onto the tops of the loaves—sesame, poppy seed, sunflower seed, or pumpkin seed, and some oats, for an artisan appearance.
Bake for 30 minutes and remove from tins or cookie sheets after 5 minutes.
To use during the next two weeks:
You can do this with all the dough, or bake one loaf immediately and put the rest in the fridge.
To keep dough for future use, put it in a container with a lid that has a small hole in it, or in a bowl covered with plastic wrap but make sure there’s a little escape valve in the plastic.
To bake, remove the dough from the fridge and let it rise for 1 ½ to 3 hours, then bake as above.


