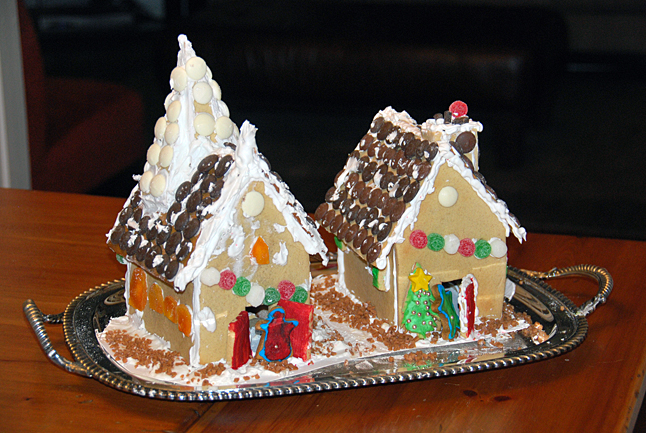
My first ever venture as a food writer was in 1977 — stifle the gasps please — when we lived in Edmonton and had six children plus one girlfriend living with us. I sent off an article on spec to the Edmonton Journal, and the next day came home to loud after-school excitement. “The newspaper was just here,” the kids said. “They took a picture of the gingerbread house.”
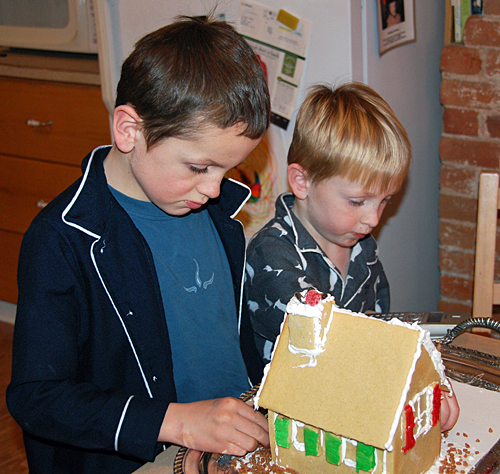
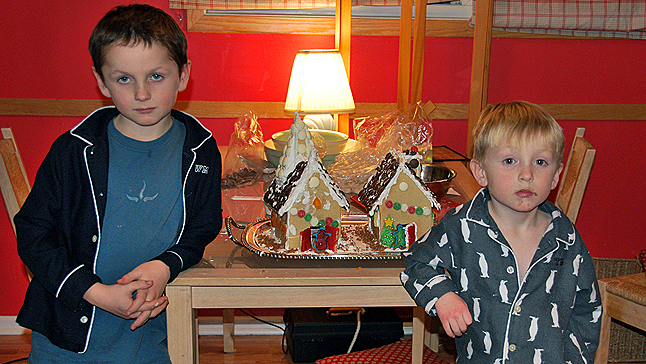
This is to say that I have a warm fuzzy place in my heart for gingerbread houses. Last weekend we made one, William and Thomas and me. So the wonder of it, and the mess, are right up there front and centre in my head.
First, give yourself lots of time: make the dough, make the pattern, bake the cookies and let them cool overnight, then do the icing and construction. Let the building harden overnight — the mortar after all is egg white and sugar, not concrete — before applying the decorations.
It’s most fun if you do this with children, who really delight in both planning the house and putting on the candies. William drew the village he wanted, and we made a house plus a church. If the appearance is less than ultra-professional, it’s one of those times when less is more.
I made two doughs (okay, I ran out of the first one before we got to the church roof, as the church itself was a William design that I hadn’t planned.) In one dough, we used brown rice syrup, which gives a milder and more child-friendly flavour than molasses. William and Tom assessed the milder one as excellent but the molasses dough as just okay. You could also use honey, the traditional German gingerbread way. (The very trad recipe also omits the butter; I find this makes it very difficult to mix and to shape.) My recipe also cuts down on spice, for the same reason. I dislike cloves, so never use them, but you can vary the spice content here to fit personal tastes.
This recipe gives a dough that is mild in taste and soft in texture once you eat it, but solid enough to hold its shape and stand up to the rigours of construction without a wood frame. The dough is very malleable and easy to work.
If you run a candy-free household (bless your heart) you could use dried fruit and/or nuts for the decorations. I’ve done this, during the same phase of my life in which I put brewers’ yeast into the kids’ orange juice and thus enshrined my reputation as the witchiest mother of the year. Candy is funner, as the kids say.
Assemble utensils first:
• Rolling pin and cloth or board to roll dough on
• Two ¼ inch thick wood battens (or chopsticks) to assist with rolling to consistent thickness
• Big bowls, measuring cups and spoons and small bowls for mixing icing colours
• Cake decorating bag if possible, with just a plain nozzle. (You can substitute a knife)
• A sharp long knife with a flat cutting side
• Two cookie sheets
• A grid for cooling cookies
• Spatulas—one long and very flat, one egg turner type
• Paper, ruler, scissors
• A tray on which to place the house, and stiff paper or card stock for underneath it.
Decorative ingredients

With tiny cookie cutters, you can make and ice all decorations needed. I have used cookie cutters, bottle caps, pea shooters, lipstick tops, doll tea cups. Otherwise, buy bulk chocolate and candy bits — whatever you like, but choose small ones.
Make the patterns for the cookie pieces. See photo. Squared paper is a boon. Be careful measuring — the house must fit together. You can see in the photo that my church steeple could use a little adjustment.
Dough for Gingerbread Cookies
6 cups flour
½ tsp baking powder
2 tsp ginger
2 tsp cinnamon
½ tsp allspice
12 tbsp (1 ½ sticks) soft unsalted butter — melted in the microwave if necessary
1 ½ cups brown sugar
2 eggs
1 cup brown rice syrup, molasses or honey
2 tsp orange juice
Step 1: Mix the dough
Sift and measure the flour. I often don’t bother sifting, but if you are using honey this is important as the flour must absorb the honey and sifting helps. Add baking powder and spices.
Beat together the eggs, brown sugar, brown rice syrup, butter and orange juice. Slowly add the wet to the dry ingredients, beating well after each addition. The dough will look like kitty litter at first. Keep mixing and beating. When it begins to adhere, pour it all out onto a board and gather into a ball. Knead the dough about ten times, or until it begins to feel soft and elastic. Divide into two balls and wrap in plastic wrap. Leave 2-3 hours or overnight in the fridge, tightly wrapped, before rolling out.
Step 2: make the pattern
Draw the pattern on squared paper and cut it out

Step 3: Roll out dough and bake the cookies
Preheat oven to 350 F.
Dust a little flour onto a board or pastry cloth, and onto the rolling pin. Work with a one inch slab of dough at a time, cut from one of the pastry balls. Place the two wood battens on either side of the board, and roll the dough in between. This results in a consistent thickness—you work like a potter rolling clay for slab construction. You may have to roll a couple of times without the battens to make the dough large enough for the pattern pieces to fit. This is fine.
Using a sharp long flat knife, cut the dough using the pattern. Make sure your slices are at right angles to the table or board. Gently lift the cookie pieces with a spatula and place them on a very lightly buttered cookie sheet.
In addition to the cookie pattern pieces, cut about 20 little rectangular “bricks” measuring ¼ inc by ¾ inch. You will use these to support the inside corners of the house.
Use one cookie sheet for small pieces and one for the larger sides and roof. Bake small pieces 5-8 minutes and larger pieces for 15 minutes. They should appear very slightly puffed, dry, and just beginning to brown on the edges when done. Don’t overcook unless you want your house to be for decoration only.
When done, cool on the cookie sheet for 10 minutes, then remove to a rack and let cool completely. If lumps or bubbles appear during baking, flatten them with a spatula, very gently, as they cool. Let the cookies cool and settle for at least a few hours if not overnight.
Step 4: Make the mortar (icing)
¼ cup pasteurized egg white from the dairy section at the grocery store
3 cups icing sugar
1 tsp lemon juice
Beat the egg white until foamy, then slowly add the icing sugar and beat for about 5 minutes, until the mixture is thick, creamy, and hold stiff peaks. Add lemon juice and beat again for a minute or so. I use an electric beater for this, but an old fashioned hand egg beater will do. So will a whisk, if you read Mrs. Beeton; if you can do this you are a person of more courage and fortitude than I.

Step 5: Assemble the house
This part does require some concentration. It can be messy, but it’s amazing how easily the house does stay together.
Lay out on the tray on which you plan to present the house, the four sides of the building insides up,. With a knife or a pastry tube, put down a thick line of icing to mark the shape of the floor. Just inside the edge of this line, build 4 little support columns of bricks, using mortar to stick them together. Then raise one side and one end wall. Lay icing on the bottom of each piece so it will stick to the tray, on the ends, and on the corner brick columns where they will meet the walls. Raise the sides and glue them together. Make sure the side wall fits INSIDE the end walls on both ends. Once the walls are standing, apply more icing.
Repeat with the other sides. Very carefully with a knife tip, push the brick columns against the walls so that they provide some support, and drizzle more icing down around them. Let the walls dry before you try to fit the roof.
When all seems very solid, it’s time to put on the roof. Apply lots of icing along the upper edges of the walls and onto the inside of the roof pieces where they will meet, and also where they will meet the walls. This is the trickiest part: you have to hold the roof pieces in place, and adjust them, without causing the walls to collapse. But the icing sets fairly quickly, and after a few minutes holding the roof in the right place you’ll feel that it seems to take shape and stay put. Leave it to dry before applying the chimney.
I cut out doors and shutters. Cutting into the dough to make windows weakens the structure, so it’s best to pipe windows on to the walls.
Let the house dry overnight before applying the decorative yummy bits.
Step 6: Decorate the building!
Mix up another batch of icing if you used all the first one (if you make just one house, you should have enough left over, kept in a sealed plastic container, to do the décor.)
Use the icing to apply candies or little cookies. You can colour the icing in batches to make bright tiny decorative cookies. (We made little stars and coloured them yellow, but we ate them before they made it to the house.)
This is the part children really do love, and it’s easy so even a small child can help. You just dip the candy in the icing and stick it in place. Of course, kids eat lots of the stuff along the way, so after lunch or dinner, rather than before, is the best timing. You will be the arbiter of random acts of creative decoration versus a carefully planned professional “look.”
The gingerbread keeps for a week or two, and so long as you use pasteurized egg white rather than fresh eggs, so should the icing.
Demolition tends to happen quite fast.


